Showing posts with label Dolls. Show all posts

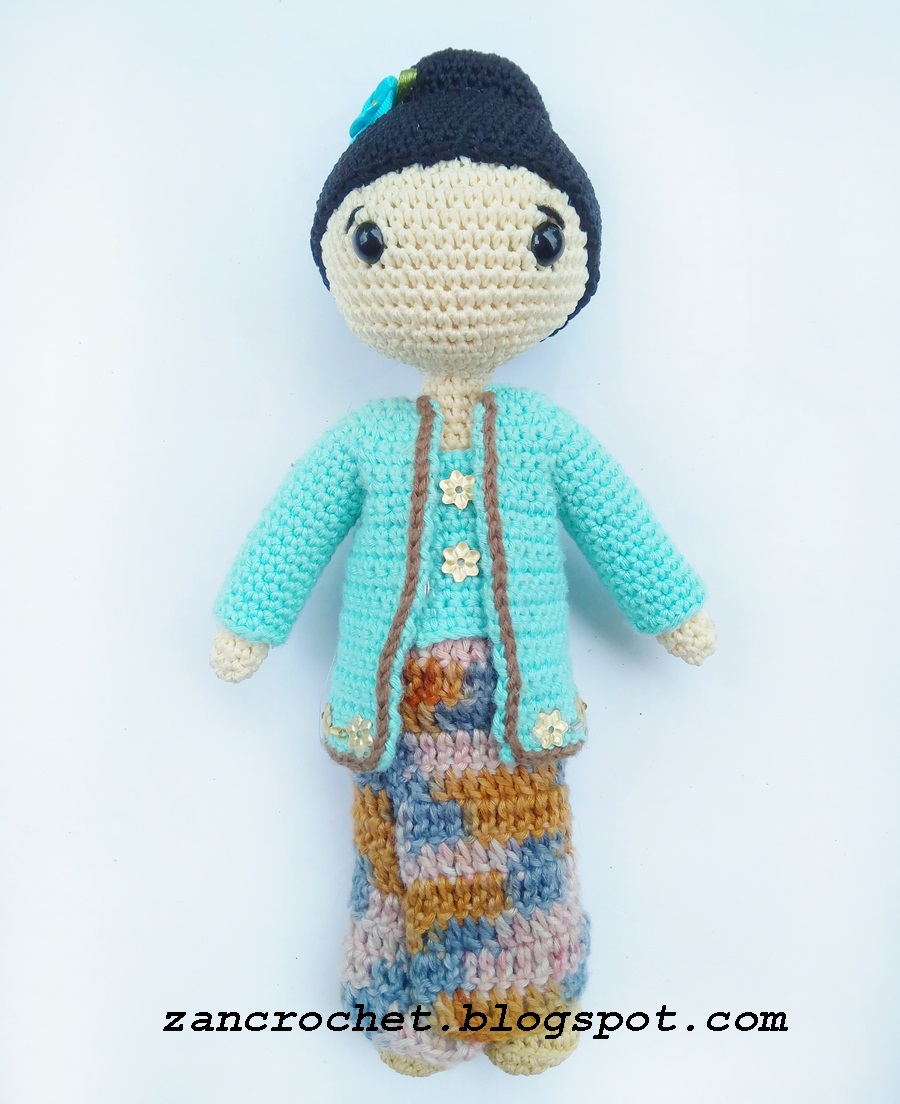
Kartini Doll

These doll are wearing one of Indonesia transitional clothes, which called "Kebaya Kutu Baru" . It is the simplest design of kebaya. Usually kebaya is combined with sarong, batik or songket for its skirt.

For Dutch version please click here


Abbreviations:
sc: single crochet    
ch: chain
St: Stitch
inc : increase
dec: decrease
dc : double crochet
Sl st : slip stitch
F/O: Fasten off

Materials:
2 mm crochet hook
yarn in skin color, black, Tosca (or any color you like) and batik color
Needle for sewing
Stuff
Scissors
8 mm safety eyes
3 pair of press stud buttons
Note: Work in continuous round

Head:
Using skin color
R1: ch 2, starting from second chain from hook 6 sc
R2: inc, rep 6x (12)
R3: sc, inc, rep 6x (18)
R4: sc, inc, [2 sc, inc = rep 5x], sc (24)
R5: 3 sc, inc, rep 6x (30)
R6: 2 sc, inc, [4 sc, inc = rep 5x], 2 sc (36)
R7: 5 sc, inc, rep 6x (42)
R8: 3 sc, inc, [6 sc, inc = rep 5x], 3 sc (48)
R9-15: sc around
Attach eyes between R11-12, give 8 sts space between them
R16: 3 sc, dec, [6sc, dec = rep 5x], 3 sc (42)
R17: 5 sc, dec, rep 6x (36)
R18: 2 sc, dec, [ 4 sc, dec = rep 5x], 2 sc (30)
R19: 3 sc, dec, rep 6x (24)
stuff
R20: 2 sc, dec, rep 6x (18)
R21: sc, dec, rep 6x (12)
Add more Stuff
F/O


Hair:
Using black
R1: ch 2, starting from second chain from hook 6 sc
R2: inc, rep 6x (12)
R3: sc, inc, rep 6x (18)
R4: sc, inc, [2 sc, inc = rep 5x], sc (24)
R5: 3 sc, inc, rep 6x (30)
R6: 2 sc, inc, [4 sc, inc = rep 5x], 2 sc (36)
R7: 5 sc, inc, rep 6x (42)
R8: 3 sc, inc, [6 sc, inc = rep 5x], 3 sc (48)
R9-17: sc around
F/O leaving a long tail for sewing

Hair Bun:
Using black
R1: ch 2, starting from second chain from hook 6 sc
R2: inc, rep 6x (12)
R3: sc, inc, rep 6x (18)
R4: sc, inc, [2 sc, inc = rep 5x], sc (24)
R5: 3 sc, inc, rep 6x (30)
R6: 2 sc, inc, [4 sc, inc = rep 5x], 2 sc (36)
R7-9: sc around
R10: 4 sc, dec, rep 6x (30)
F/O leaving a long tail for sewing


Arms (make 2):
Using skin color
R1: ch 2, starting from second chain from hook 6 sc
R2: sc, inc, rep 3x (9)
R3-21: sc around
Stuff
R22: sc, dec, rep 3x (6)

Legs and Body:
Legs (make 2):
Using shoes color
Ch 6,
R1: starting from 2nd chain from hook, 4 sc, 3 sc in last st, continue your work st around the other side of chain, 3 sc, 2 sc in last st (12)
R2: inc, 3 sc, 3 inc, 3 sc, 2 inc (18)
R3: sc, inc, 4 sc, inc, sc, inc, sc, inc, 4 sc, inc, sc, inc (24)
R4: BLO, sc around
R5: 6 sc, 6 dec, 6 sc (18)
R6: 3 sc, 6 dec, 3 sc (12)
Stuff
CC to skin colocr
R7: BLO, sc around
R8-22: sc around
Stuff, CC to grey
R23-24: sc around
Stuff
F/O, but don’t cut 2nd legs yarn. In next round both legs will be crocheted together. The position of yarn must be in the middle of left side of 2nd leg, add one or two sc if needed.

Body:
Chain 2, both sides of chain will count as stitches.
R25: sc around in 1st leg , sc in each of chain sts (back side), sc around in 2nd legs sts, sc in each chain sts (front side) (28)
R26: 13 sc, inc, rep 2x (30)
R27-30: sc around
R31: CC to skin color, work in BLO, sc around
R32-34: sc around
R35: 3 sc, dec, rep 6x (24)
R36-40: sc around
Stuff
R41: 2 sc, dec, rep 6x (18)
R42-43: sc around
R44: sc, dec, rep 6x (12)
R45-47: sc around
Stuff
F/O leaving a long tail for sewing

Kebaya cloth:
Using tosca or any color
R1: ch 19, starting from second chain from hook, 2 sc, 3 sc in same st, 3 sc, 3 sc in same st, 4 sc, 3 sc in same st, 3 sc, 3 sc in same sts, 2 sc, ch 1, turn (26)
R2: sc in each sts, ch 1, turn (26)
R3: 3 sc, 3 sc in same st, 5 sc, 3 sc in same st, 6 sc, 3 sc in same st, 5 sc, 3 sc in same st, 3 sc, ch 1, turn (34)
R4: sc in each sts, ch 1, turn (34)
R5: 4 sc, 3 sc in same st, 7 sc, 3 sc in same st, 8 sc, 3 sc in same st, 7 sc, 3 sc in same st, 4 sc , ch 1, turn (42)
R6: 5 sc, ch 5, skip 9, 14 sc, ch 5, skip 9, 5 sc, ch 1, turn (34)
R7-20: sc in each sts, ch 1, turn (34)
R21: 4 sc, inc, 24 sc, inc, 4 sc, ch 1, turn (36)
R22: sc in each sts, ch 1, turn
R23: 5 sc, inc, 24 sc, inc, 5 sc, ch 1, turn (38)
R24: sc in each st
F/O
Sleeves: 
continue working in hand holes to make sleeves.
Start from upper right side of R7, 5 sc, then, continue to R6, 9 sc (14)
R2-16: sc around
F/O
Repeat the steps to another hand hole
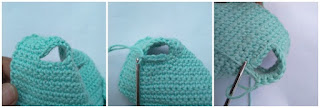
Continue working in upper side of cloth, sl st start from left to bottom and right side of kebaya.

Middle Part of Kebaya:
R1: ch 9, starting from second chain from hook, sc in each sts (8)
R2-13: ch 1, turn, sc in each sts
F/O leaving a long tail for sewing

Batik Skirt:
R1; ch 42, starting from 4th st, dc in each sts, (first ch 3 counted as 1st dc)
R2-11: ch 3, turn, dc in next each 41 sts
F/O leaving a long tail for sewing


Finishing:
Sew head on body. Add more stuff before it close completely.
Sew Arms on body.


Sew hair on head. Stuff the bun, then sew it on the hair. Add more stuff if needed before you sew it completely.

Sew batik skirt to body, or sew press stud button to its skirt.
Sew the press stud buttons to inner side of kebaya and front side of middle part of kebaya. Join another side by sewing them together. See picture as a guide

Sew some sequins on kebaya (optional)

This pattern is an original by me, Zan Merry. Please do not claim this pattern as your own. If you wish to share this pattern, you may link this pattern but please do not reprint it to your site or share it in a pdf or picture format.

You may keep a copy of this pattern for personal use but you may not sell the pattern. You can sell the items that you made from this pattern as you credit me as the designer.

Please leave comment if you have a question or find any mistake in my pattern. I will do the corrections as soon as possible. I will be happy to see your creation from this pattern so please share your handmade to my Facebook Page Zan Amigurumi or Instagram @zancrochet

Thanks...

Little Girl

This little doll is about 11 cm tall. The original pattern is a hijab girl but can be modification to be a girl without hijab.
Please like my Facebook page Zan Amigurumi and follow my Instagram @zancrochet for getting more information about my free patterns or sharing the creation that you've made from any pattern that share in this blog.
Untuk versi Bahasa Indonesia, kamu bisa klik disini.
Dutch version: kleine meisjes


Abbreviations:
sc: single crochet    
ch: chain
St: Stitch
inc : increase
dec: decrease
sl st : slip stitch
hdc: half double crochet
dc: double crochet
dc inc: two dc in same stitch
F/O: Fasten off
CC : change color
BLO: back loop only
R: Round
Rep:  repeat

Materials:
2 mm crochet hook
Yarn in various colors (skin color , black color for hair and any color for her dress)
Needle for sewing
Stuff
Scissors
Small black beads for eyes

Note: Work in continuous round


Feet and Legs (make 2):
Use blue
Ch 4
Work in both sides of chains
R1: sc in second chain from hook, sc in next st,  3 sc in the corner, sc in next st, 2 sc in last st (8)
R2: inc, sc, [inc = 3x], sc, [inc = 2x] (14)
R3: sc around
R4: 3 sc, [dec = 4x], 3 sc (10)
stuff
R5:  3 sc, [dec=2x], 3 sc (8)
CC to skin color
R6-12: sc around
Stuff
F/O

Body:
In next round we’re going to crochet both legs together
R13: CC color to light blue, sc around in 2nd legs sts, sc in 1st leg sts (you can join in any stitch of 1st leg as long as you are sure that both legs in good position) (16)
R14-15: sc around
R16: BLO, sc around
R17-18: sc around
R19: 2 sc, dec, rep 4x (12)
Stuff
R20: sc, dec, rep 4x (8)
R21-22: CC to skin color, sc around
Stuff
Continue the round to make head

Head:
R23:inc, rep 8x (16)
R24: sc, inc, rep 8x (24)
R25: 2 sc, inc, rep 8x (32)
R26-31: sc around
R32: 2 sc, dec, rep 8x (24)
R33: 2 sc, dec, rep 6x (18)
Stuff
R34: sc, dec, rep 6x (12)
Add more stuff if needed
R35: dec, rep 6x (6)
F/O

Arms (make 2):
Use skin color
R1: ch 2, starting from second chain from hook 6 sc
R2: sc around
CC to light blue
R3-9: sc around
Give a little stuff
F/O leaving a long tail for sewing. Sew the hand to body.

Skirt:
Start in front loop of R15
Use light blue
R1: sc around, sl st to first st (16)
R2: ch 3 (count as 1st dc), dc inc, [dc, dc inc = rep 7x], sl st to first st (24)
R3: ch 3, dc, dc inc, [2 dc, dc inc = rep 7x], sl st to first st (32)
R4: ch 3, 2 dc, dc inc, [3 dc, dc inc = rep 7x], sl st to first st (40)
R5: ch 3, 3 dc, dc inc, [4 dc, dc inc = rep 7x], sl st to first st (48)
R6: ch 3, dc in next 47 st, sl st to first st (48)
CC to yellow
R7: sc around
F/O

Hijab:
Use blue
R1: ch 2, starting from second chain from hook 6 sc
R2: inc, rep 6x (12)
R3: sc, inc, rep 6x (18)
R4: 2 sc, inc, rep 6x (24)
R5: 2 sc, inc, rep 8x (32)
R6-10: sc around
R11: 4 sc, 1 hdc, 22 dc, 1 hdc, 4 sc (32)Put the hijab on head
R12: 3 sc, ch 6, sc in 29th st of R11, sc in next 2 sts (12) (chain sts position are in front of the neck)
R13: sc around (12)
R14: sc, inc, rep 6x (18)
R15: 2 sc, inc, rep 6x (24)
R16: 3 sc, inc, rep 6x (30)
R17: 4 sc, inc, rep 6x (36)
R18: CC to yellow, sc around
F/O

Finishing:
Attach eyes on head.
Sew nose or mouth.
Add accessories on hijab or skirt (optional) 
You can add one more round by sc in all R11 sts by using contrasting color.

Modifications:
Hair/Part 1:
Use black
R1: ch 2, starting from second chain from hook 6 sc
R2: inc, rep 6x (12)
R3: sc, inc, rep 6x (18)
R4: 2 sc, inc, rep 6x (24)
R5: 2 sc, inc, rep 8x (32)
R6-12: sc around
F/O leaving a long tail for sewing


Part 2/curly hair:
Use black; make 2 or more according how many you need it
Ch 20
R1: starting from second chain from hook, inc in each sts
F/O leaving a long tail for sewing

Finishing:
Sew the 1st part of hair on head.
Sew the curly part on 1st part of hair. You can sew the curly hair on bottom side, on the middle  or in right and left side of head.
Add accessories if you like

Hand color modification:
See hand pattern.
R1-6: use skin color
R7-9: use cloth color

Skirt: For shorter skirt, just crochet the skirt until R3. Add more one round by crocheting sc in each sts, use contrasting color.

This pattern (a hijab girl) is made by Shithi Sofwan, the modification parts made by admin Team of Facebook group Belajar Amigurumi Bareng yukk that have had permission from its designer to give a little modification to the original pattern. This lithe girl (Hijab Girl) pattern has had permission from the owner to be shared publicly in Belajar amigurumi blog for Indonesian version and Zan crochet blog for English version.
Please do not claim this pattern as your own. If you want to share this pattern, just share the link of this blogsite and do not share it in picture, pdf version or rewrite on any other site or blog. You may save the copy of this pattern for personal use only. You are permitted to sell the items that you make from this pattern as you credit Shithi Shofwan as a designer. It’s forbidden to sell this pattern.
Thanks.

Kokeshi Dolls in Fruit Costumes

Free amigurumi pattern - After searching some ideas from internet finally found what i really wanted. It needed several day for trying the pattern.. And here they are... five Kokeshi dolls in fruit costumes. Actually I am not satisfy yet because I really want to make them in watermelon and grapes costumes, but i lack my yarn and ideas :D Hope you can enjoy this pattern.. Don't forget to join my Facebook Page Zan Amigurumi and share your creation on my wall.. Happy crochet!!!

Abbreviations:
sc: single crochet   
ch: chain
st: stitch
inc : increase
dec: decrease
sl st : slip stitch
rep: repeat
F/O: Fasten off

Materials:
2 mm crochet hook
Yarn in various colors
Needle for sewing
Stuff
Scissor
Small black beads for eyes
Black yarn for making mouth

Note: This project is working in continuous rounds. If needed, use smaller hook to crochet head part.

Head:
Use creamy
R1: ch 2, starting from second chain from hook 6 sc
R2: inc, rep 6x (12)
R3: sc, inc, rep 6x (18)
R4: 2sc, inc, rep 6x (24)
R5: 3sc, inc, rep 6x (30)
R6-10: sc around
R11: 3 sc, dec, rep 6x ( 24)
R12: 2 sc, dec, rep 6x (18)
Stuff
F/O leaving a long tail for sewing

Basic Body:
Use contrasting color
R1: ch 2, starting from second chain from hook 6 sc
R2: inc, rep 6x (12)
R3: sc, inc, rep 6x (18)
R4: BLO sc around
CC to main color:
R5: 8 sc, inc, rep 2x (20)
R6: sc around
R7: 9 sc, inc, rep 2x (22)
R8: sc around
R9: 10 sc, inc, rep 2x (24)
R10-12: sc around
R13: 10 sc, dec, rep 2x (22)
R14: 9 sc, dec, rep 2x (20)
R15: 8 sc, dec, rep 2x (18)
R16: 7 sc, dec, rep 2x (16)
R17: 6 sc, dec, rep 2x (14)
stuff
F/O

Sleeves (make 2):
Use main color, leave a long tail for sewing before you start making chain
R1: ch 2, starting from second chain from hook 5 sc
R2: inc, rep 5x (10)
R3: 4 sc, inc, rep 2x (12)
R4: 5 sc, inc, rep 2x (14)
R5: 6 sc, inc, rep 2x (16)
R6: 7 sc, inc, rep 2 (18)
R7: sc around
R8: CC to contrasting color, sc around
F/O

Notes for Fruit Kokeshi bodies and sleeves:
Lemon Kokeshi: light green  for contrasting color and yellow for main color.
Mangosteen Kokeshi: light green  for contrasting color and dark purple for main color.
Orange Kokeshi: light green  for contrasting color and orange for main color.
Avocado Kokeshi: brown  for contrasting color and light green for main color.
Strawberry Kokeshi: dark green  for contrasting color and red for main color.

Fruit caps for each costumes:
Lemon Cap:
Use yellow
R1: ch 2, starting from second chain from hook 5 sc
R2: inc, rep 5x (10)
R3: sc around
R4: 4 sc, inc, rep 2x (12)
R5: sc around
R6: sc, inc, rep 6x (18)
R7: 2 sc, inc, rep 6x (24)
R8: 3 sc, inc, rep 6x (30)
R9-11: sc around
R12: 21 sc, ch 1, turn (21)
R13- 16: rep R12
R17: dec, 5sc, rep 3x (18)
R18: ch 1, turn, 18 sc, give a little stuff
F/O leaving a long tail for sewing

Orange and Mangosteen Caps:
Use orange for orange cap and light purple for mangosteen
R1: ch 2, starting from second chain from hook 6 sc
R2: inc, rep 6x (12)
R3: sc, inc, rep 6x (18)
R4: 2sc, inc, rep 6x (24)
R5: 3sc, inc, rep 6x (30)
R6-8: sc around
R9: 21 sc, ch 1, turn (21)
R10-13: rep R9
R14: dec, 5sc, rep 3x (18)
R15: ch 1, turn, 18 sc
F/O leaving a long tail for sewing

Avocado cap:
Use light green
R1: ch 2, starting from second chain from hook 6 sc
R2: inc, rep 6x (12)
R3: sc, inc, rep 6x (18)
R4-5: sc around
R6: 8 sc, inc, rep 2x (20)
R7: 9 sc, inc, rep 2x (22)
R8: 10 sc, inc, rep 2x (24)
R9-10: sc around
R11: 3 sc, inc, rep 6x (30)
R12-15: sc around
R16: 21 sc, ch 1, turn (21)
R17-20: Rep R16
R21: dec, 5sc, rep 3x (18)
R22: ch 1, turn, 18 sc
give a little stuff
F/O leaving a long tail ffor sewing

Strawberry Cap:
Use red
R1: ch 2, starting from second chain from hook 6 sc
R2: inc, rep 6x (12)
R3: sc, inc, rep 6x (18)
R4: 2sc, inc, rep 6x (24)
R5: sc around
R6: 3sc, inc, rep 6x (30)
R7-9: sc around
R10: 21 sc, ch 1, turn (21)
R11-14: rep R 10
R15: dec, 5sc, rep 3x (18)
R16: ch 1, turn, 18 sc
give a little stuff
F/O leaving a long tail ffor sewing

Orange and avocado leaves:
Use light green for orange and dark green for avocado
R1: ch 2, starting from second chain from hook 4 sc
R2: inc, rep 4x (8)
R3: sc around
R4: sc, inc, rep 4x (12)
R5: sc around
R6: 2 sc, inc. rep 4x (16)
R7: sc around
R8: 2 sc, dec, rep 4x (12)
R9:  sc, dec, rep 4x (8)
R0: dec, rep 4x (4)
F/O leaving a long tail for sewing

Strawberry leaf: 
Use dark green
R1: ch 2, starting from second chain from hook 6 sc
R2: ch 5, sc in second chain from hook, 3 sc, sl st, rep 6x
F/O leaving a long tail for sewing

Orange and avocado stems:
Use brown
R1: ch 2, starting from second chain from hook 6 sc
R2-5: sc around
stuff
F/O leaving along tail for sewing

Mangosteen Stem:
Use light green
R1: ch 2, starting from second chain from hook 4 sc
R2: inc, rep 4x (8)
R3-5: sc around
R6: 5 dc in a stitch, sl st to next st, rep 4x
F/O leaving a long tail for sewing

Finishing:
  • Sew body to head
  • Sew eyes and mouth on head
  • Sew sleeves to body
  • Sew fruit cap on head
  • For mangosteen, avocado and orange: sew stem on fuit cap.
  • For avocado and orange: sew leaf beside stem
  • For strawberry: sew leaf on strawberry cap
This pattern is an original by me, Zan Merry. Please do not claim this pattern as your own. If
you wish to share this pattern, you may link this pattern but please do not reprint it to your site.
You may keep a copy of this pattern for personal use but you may not sell this pattern. You can
sell the items that you made from this pattern as you credit me as the designer.

Please leave a comment if you have a question or find some mistake in my pattern... I will reply your question or do the correction as soon as possible. Please share your creation from this pattern on my Facebook Page Zan Amigurumi
Thanks...

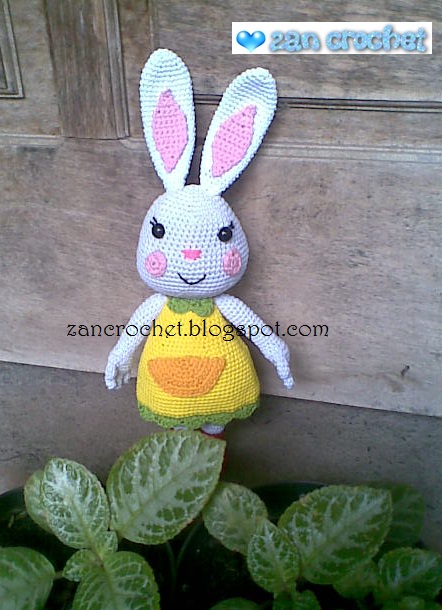
Mimi Rabbit

Free amigurumi pattern - Mimi Rabbit or in Indonesia called Mimi Kelinci is one of character from Mimi Rabbit Series (seri Mimi kelinci) that educate children about many good things.
This doll is about 22 cm (not include the ears), but the size is depend on the yarn and hook you used.

Please join my Page on Facebook Zan Amigurumi and follow my Instagram @zancrochet

For Dutch version please click here
For Turkish version please click here
 
Materials needed:
Yarn in white, yellow, red, pink, light green and light orange
2 mm crochet hook
Polyester fiberfill
Stitch marker for working in the round
Needle for sewing
8 mm safety eyes
Scissor
Glue

Abbreviations:
sc = single crochet
inc = increase
dec = decrease
sl st = slip stitch
st = stitch
ch = chain
skp = skip
R = round
CC = change color
BLO = back loops only
FO = fasten off

Note: This project is working in continuous rounds, do not join or turn unless otherwise
stated. Mark first stitch of each round.

Head:
Using white
R1: ch 2, starting from second chain from hook 6 sc
R2: inc, rep 6x (12)
R3: sc, inc, rep 6x (18)
R4: 2 sc, inc, rep 6x (24)
R5: 3 sc, inc, rep 6x (30)
R6: 4 sc, inc, rep 6x (36)
R7: 5 sc, inc, rep 6x (42)
R8: 6 sc, inc, rep 6x (48)
R9-14: sc around
R15: 3 sc, inc, rep 12x (60)
R16: 9 sc, inc, rep 6x (66)
If you are using safety eyes, attach them in R11 - R12, leaving 10 st between them.
R17-22: sc around
R23: 9 sc, dec, rep 6x (60)
R24: 8 sc, dec, rep 6x (54)
R25: 7 sc, dec, rep 6x (48)
R26: 6 sc, dec, rep 6x (42)
R27: 5 sc, dec,rep 6x (36)
R28: 4 sc, dec, rep 6x (30)
stuff
R29: 3 sc, dec, rep 6x (24)
F/O

Blushes (make 2):
Using pink
R1: ch 2, starting from second chain from hook 6 sc
R2: inc, rep 6x (12)
F/O

Ears (make 2):
Using white
R1: ch 2, starting from second chain from hook 5 sc
R2: inc, rep 5x (10)
R3: sc, inc, rep 5x (15)
R4: sc around
R5: 2 sc, inc, rep 5x (20)
R6: sc around
R7: 9 sc, inc, rep 2x (22)
R8-19: sc around
R20: 9 sc, dec, rep 2x (20)
R21: sc around
R22: 8 sc, dec, rep 2x (18)
R23: sc around
R24: 7 sc, dec, rep 2x (16)
R25: sc around
R26: 6 sc, dec, rep 2x (14)
R27: 5 sc, dec, rep 2x (12)
R28: 4 sc, dec, rep 2x (10)
F/O leave a long tail for sewing

Inner Ears (make 2):
Using pink
R1: ch 2, starting from second chain from hook 2 sc
R2 : ch 1, turn, sc in each st
R3: ch 1, turn, inc in each st (4)
R4: ch 1, turn, sc in each st
R5: ch 1, turn, inc, 2 sc, inc (6)
R6-10: ch 1, turn, sc in each st
R11: ch 1, turn, dec, 2 sc, dec (4)
R12: ch 1, turn, sc in each st
R13: ch 1, turn, 2 dec (2)
R14: ch 1, turn, sc in each st
R15: ch 1, turn, dec (1)
F/O Leave a long tail for sewing


Legs and Body:
Legs (make 2):
Using red
ch 6
R1: starting from 2nd chain from hook, 4 sc, 3 sc in last st, continue your work st around the other side of chain, 3 sc, 2 sc in last st. (12)
R2: inc, 3 sc, 3 inc, 3 sc, 2 inc (18)
R3: sc, inc, 4 sc, inc, sc, inc, sc, inc, 4 sc, inc, sc, inc (24)
R4: 3 sc, inc, rep 6x (30)
R5: BLO sc around
R6: sc aorund
R7: 9 sc, 6 dec, 9 sc (24)
R8: 6 sc, 6 dec, 6 sc (18)
R9: 6 sc, 3 dec, 6 sc (15)
stuff
R10-13: sc around
CC to white
R14: BLO, sc around
R15-23: sc around
stuff
F/O but don't cut the yarn for 2nd legs

Body:
Using white
In this part we will crochet both legs together.
Take 2 nd leg, ch 1, this chain will be counted as 2 stitch (back and front)
R24: join 1 st leg, sc around 1st leg (make sure that you put both legs in same possition. I started sc in 5th st of 1st leg), sc in ch st (back side), sc around in 2nd leg, sc in ch st (front side) (32 st in total)
R25: sc around (32)
R26: 3 sc , inc, rep 8 x (40)
R27: 4 sc, inc, rep 8x (48)
R28-34: sc around
R35: 6 sc, dec, rep 6x (42)
R36-39: sc around
R40: 5 sc, dec, rep 6x (36)
R41-43: sc around
R44: 4 sc, dec, rep 6x (30)
R45-48: sc around
R49: 3 sc, dec, rep 6x (24)
R50: sc around
stuff
F/O leave a long tail for sewing
Using red yarn, continue working in front loop of R13,  sl st around F/O

Hands and arms (make2):
Using white
Thumb:
R1: ch 2, starting from second chain from hook 5 sc
R2-3: sc around
F/O leave long tail for sewing the gap

Fingers (make 3):
R1: ch 2, starting from second chain from hook 5 sc
R2-4: sc around
F/O leave tail for sewing the gap
For the 3rd finger don't cut the yarn

Hand:
The fingers now will be crocheted together.
R1: sc in next 2 st of 3rd finger, take 1st finger and sc in next 3 st, take 2nd finger and sc in all st, sc in next 2 st of 1st finger (middle finger), sc in the last 3 st of 3rd finger (15)
R2: sc around
R3: in this part the thumb will be crocheted together, 8sc, (take the thumb) sc in 5 st of thumb, sc in last 7st (20)
R4: sc around
R5: 8 sc, dec, rep 2x (18)
R6: sc, dec, rep 6x (12)
stuff
R7-22: sc around
stuff
F/O leave a long tail.

Dress:
Using yellow
R1: 36 Sc in magic ring (36) (don’t close the ring completely)
R2: sc around
R3: 5 sc, inc, rep 6x (42)
R4-6: sc around
R7: 6 sc, inc, rep 6x (48)
R8: 7 sc, inc, rep 6x (54)
R9-10: sc around
R11: 8 sc, inc, rep 6x (60)
R12: 9 sc, inc, rep 6x (66)
R13-15: sc around
R16: 10 sc, inc, rep 6x (72)
R17-27: sc around
CC to light green
R28: sc around, sl st to first st
R29: skp 2, 5 dc, skp2, sl st, rep around (12 fan stitch in total)

Dress Collar: 
Using light green
Ch13
R1: sc in second ch from hook, sc in next 11 st (12)
R2: ch 1, turn, skp 2, 5 dc in one st, skp 2, sl st, skp 2, 5 dc, sl st
F/O Leave a long tail for sewing
Dress Pocket:
Using light orange
R1: ch 2, starting from second chain from hook 3 sc
R2: ch 1, turn, inc in each (6)
R3: ch 1, turn, sc, inc, rep 3x (9)
R4: ch 1, turn, 2 sc, inc, rep 3x (12)
R5: ch 1, turn, 3 sc, inc, rep 3x (15)
R6: ch 1, turn, 4 sc, inc, rep 3x (18)
R7: ch 1, turn, 5 sc, inc, rep 3 x (21)
R8: ch 1, turn, 6 sc, inc, rep 3x (24)
F/O leave long tail for sewing

 
Finishing:
 

  • If you do not use safety eyes you can used small black felt then glue them on head.
  • Sew nose by using pink yarn
  • Sew eyebrow and mouth by using black yarn
  • Sew or glue blushes on her face
  • Put the dress over the body and sew the body to the head.
  • Tighten the Magic ring of the dress and give a little sewing to the body.  
  • Sew the pocket to dress
  • Sew  dress collar to its dress
  • Sew arms, I suggest sew the arms on the dress only.
  • Sew the inner ears to each ears.
  • Sew both ears on the head.
This pattern is made by me, Zan Merry. Don’t reprint it to your site or blog. You can sale the ami that you’ve made from this pattern but not the pattern. Sometime I make a mistake in writing my pattern, if you find any mistake, please leave a comment so I can edit it.
Enjoy this free amigurumi pattern. Happy crochet!!!

Last Edited : March 4, 2017

Valentine Heart Couple

Free Amigurumi Pattern - I think this is the simplest amigurumi i can make for valentine gift. I love this couple. And it will be a cute gift for someone who I love.
Just enjoy this free amigurumi heart pattern. I hope you will like them both too... And sorry for my bad English...
For Dutch version click hier


Material:
Crochet Hook 2mm
Red, pink, creamy, black, light pink yarn
Needle for sewing
Stuff
Scissors
Black beads (4 pcs)

Abbreviations:
sc: single crochet    
ch: chain
st: stitch
inc : increase
dec: decrease
sl st : slip stitch
F/O: Fasten off
BLO : back loop only
CC : change color
Rep: repeat

Note: Work in continuous round. Repeat all steps for making Heart Girl. Change red color to pink.

Heart:
Heart Side (make 2):
Using Red
R1: ch 2, starting from second chain from hook 6 sc
R2: inc, rep 6x (12)
R3: sc, inc, rep 6x (18)
R4: 2sc, inc, rep 6x (24)
R5: 3sc, inc, rep 6x (30)
R6: 4sc, inc, rep 6x (36)
R7-8: sc around
F/O leave long tail for sewing the gap
Don’t cut second side yarn..

Heart Body:
R9: in this part both sides will be crocheted together, sc around in first side stitches (36), then sc around in second side stitches (36) (72 st in total)
R10-11: sc around (72)
R12: 10sc, dec, rep 6x (66)
R13: sc around
R14: 9sc, dec, rep 6x (60)
R15: sc around
R16: 8sc, dec, rep 6x (54)
R17: sc around
R18: 7sc, dec, rep 6x (48)
R19: sc around
R20: 6sc, dec, rep 6x (42)
R21: sc around
R22: 5sc, dec, rep 6x (36)
R23: sc around
R24: 4sc, dec, rep 6x (30)
R25: sc around
R26: 3sc, dec, rep 6x (24)
R27: sc around
Stuff
R28: 2sc, dec, rep 6x (18)
R29: sc around
R30: sc, dec, rep 6x (12)
R31: dec, rep 6x (6)
F/O
Sew the gap between its sides.


Hands and Arms (make 2):
Using red and creamy
Thumb:
Using creamy
R1: ch 2, starting from second chain from hook 4 sc
R2-3: sc around
F/O leave long tail for sewing the gap
Fingers (make 3):
Using creamy
R1: ch 2, starting from second chain from hook 4 sc
R2-4: sc around
F/O leave long tail for sewing the gap
Don’t cut the 3rd finger yarn.
Hand and Arm:
Using creamy
The fingers now will be crocheted together
R1: sc in next 2 st of 3rd finger, take 1st finger and sc in next 2 st, take 2nd finger and sc in all st, sc in next 2 st of 1st finger (middle finger), sc in the last 2 st of 3rd finger (12)
R2: sc around
R3: in this part the thumb will be crocheted together, 6sc, (take the thumb) sc in 4 st of thumb, sc in last 6 st (16)
R4: sc around
R5: 2sc, dec, rep 4x (12)
CC to red
R6: sc, dec, rep 4x (8)
Stuff
R7-14: sc around
Stuff
F/O leave long tail

Repeat thumb, fingers and hand steps to make second hands.

Legs (make 2):
Using red
Ch 7
R1: starting from second chain from hook, 5sc, 3 sc in the corner, 4sc, 2sc in the last corner (14)
R2: 5sc, 3inc, 6sc (17)
R3: 6sc, inc, sc, inc, sc, inc, 6sc (20)
R4 : 5sc, inc, 2sc, inc, 2sc, inc, 2sc, inc, 5sc (24)
R5: 6sc, 6dec, 6sc (18)
R6: 3sc, 6dec, 3sc (12)
R7: 4sc, 2dec, 4sc (10)
stuff
R8: 3sc, 2dec, 3sc (8)
R9-18: sc around
Stuff
F/O

Accessories:
For heart boy
Hat:
Using black:
R1: ch 2, starting from second chain from hook 6 sc
R2: inc, rep 6x (12)
R3: sc, inc, rep 6x (18)
R4: BLO sc around
R5-6: sc around
R7: 8sc, inc, rep 2x (20)
R8: 3sc, inc, rep 5x (25)
R9: 4sc, inc, rep 5x (30)
R10: sc around + sl st
F/O leave long tail

Bow Tie:
Using black
Ch5
R1: sc in the second ch from hook, sc in each 3 last st (4)
R2: ch1, turn, dec, 2sc (3)
R3: ch1, turn, dec, sc (2)
R4: ch1, turn, dec (1)
R5: ch1, turn, inc (2)
R6: ch1, turn, inc, sc (3)
R7: ch1, turn, 2sc, inc (4)
F/O leave long tail for sewing.
Sew the yarn to the center of R4 then wrap the yarn several times, F/O (don’t cut the yarn)
For heart girl
Ribbon:
Using light pink
Ch 9
R1: sc in the second ch from hook, sc in each 7 last st (8)
R2: ch1, turn, sc in each st (8)
R3-13: rep R2
F/O

Ribbon center:
Using light pink
Ch4
R1: sc in the second ch from hook, sc in 2 last st (3)
R2: ch1, turn, sc in each st (3)
R3-8: rep R2
F/O leave long tail...
Sew this center in the middle of ribbon.

Blushes (make 2):
Using red
R1: ch 2, starting from second chain from hook 5 sc
R2: inc, rep 5x (10)
F/O leave long tail for sewing

Finishing:


  • Sew beads for the eyes
  • Use black yarn for sewing his mouth. I use red yarn for heart girl.
  • Sew legs at the bottom of heart.
  • Sew its hands.
  • For heart boy, sew hat on left side of heart and bow near his legs. (For its hat, i prefer to put the yarn to R7 and then sew it on the heart)
  • For heart girl, sew ribbon on the right side of heart and blushes on the right and left side of her mouth.
And Congratulations, you’ve completed your Valentine Heart Couple.
 

This pattern is made by me, Zan Merry. If you wish to share this pattern, you may link this pattern but please do not reprint it to your site or blog.
You may keep a copy of this pattern for personal use but you may not sell this pattern. You can
sell the items that you made from this pattern as you credit me as the designer.

Please leave a comment if you have a question about this pattern.
If you find some mistake in my pattern, please tell me... I will do the corrections. I will be happy
to see your creation from this pattern so please share your handmade to me...
Thanks...

The Orange "Si Jeruk"

Hello.. I am Si Jeruk... I will be your friend... Please crochet me.. coz my pattern is free.

I am so happy that I can share this amigurumi orange for free. I really love this the orange. Si jeruk is a mascot of well known orange flavored drink in Indonesia ( I will not say what brand it is :D) And i think it's cute enough to be an amigurumi.. Just enjoy the pattern..

Please join my Page on Facebook Zan Amigurumi 

For French version you can click here


Abbreviations:
sc: single crochet    
ch: chain
Inc : increase
dec: decrease
st : stitch
F/O: Fasten off
BLO: back loop only
FLO: front loop only
fpsc: front post single crochet
CC: change color
Rep: repeat

Materials:
Crochet hook (I use size 2 mm)
Cotton yarn in orange, white, blue, green and brown
A little black yarn for sewing face
Needle for sewing
Stuff
Scissor
Glue
Felt in black and white color


Body/Orange:
Use Orange
R1: ch 2, starting from second chain from hook 6 sc
R2: inc, rep 6x (12)
R3: sc, inc, rep 6x (18)
R4: 2sc, inc, rep 6x (24)
R5: 3sc, inc, rep 6x (30)
R6: 4sc, inc, rep 6x (36)
R7: 5sc, inc, rep 6x (42)
R8: 6sc, inc, rep 6x (48)
R9: 7sc, inc, rep 6x (56)
R10: 8sc, inc, rep 6x (60)
R11: 9sc, inc, rep 6x (66)
R12: 10sc, inc, rep 6x (72)
R13: 11sc, inc, rep 6x (78)
R14-21: sc around
R22: 11sc, dec, rep 6x (72)
R23: 10sc, dec, rep 6x (66)
R24: 9sc, dec, rep 6x (60)
R25: 8sc, dec, rep 6x (56)
R26: 7sc, dec, rep 6x (48)
R27: 6sc, dec, rep 6x (42)
R28: 5sc, dec, rep 6x (36)
R29: 4sc, dec, rep 6x (30)
R30: 3sc, dec, rep 6x (24)
Stuff
R31: 2sc, dec, rep 6x (18)
R32: sc, inc, rep 6x (12)
R33: dec around
F/O
Leaf:
Use green
R1: ch 2, starting from second chain from hook 6 sc
R2: sc around
R3: inc, rep 6x (12)
R4: sc around
R5: sc, inc, rep 6x (18)

R6-7: sc around
R8: 2sc, inc, rep 6x (24)
R9: sc around
R10: 2sc, dec,rep 6x (18)
R11-12: sc around
R13: sc, dec, rep 6x (12)
R14: sc around
R15: dec, rep 6x (6)
R16: sc around
F/O leave long tail

Stalk:
Use brown:
R1: ch 2, starting from second chain from hook 6 sc
R2-5: sc around
stuff
F/O leave long tail for sewing

Hands (make 2):
Use white
Thumb
R1: ch 2, starting from second chain from hook 5 sc
R2-3: sc around
F/O leave long tail for sewing the gap

Fingers (make 3)
R1: ch 2, starting from second chain from hook 5 sc
R2-4: sc around
F/O leave tail for sewing the gap
For the 3rd finger don't cut the yarn

Hand
The fingers now will be crocheted together. 
R1: sc in next 2 st of 3rd finger, take 1st finger and sc in next 3 st, take 2nd finger and sc in all st, sc in next 2 st of 1st finger (middle finger), sc in the last 3 st of 3rd finger (15)
R2: sc around
R3: in this part the thumb will be crocheted together, 8sc, (take the thumb) sc in 5 st of thumb, sc in last 7st (20)
R4: sc around
R5: 2sc, dec, rep 5x (15)
R6: sc, dec, rep 5x (10)
stuff
R7: 3sc, dec, rep 2x (8)
R8-17: sc around
stuff
F/O leave long tail for sewing
Sew the open gab between its fingers
Repeat thumb, finger and hand steps for making the second hand


Shoes and Legs (make 2):
Use white and blue
Use white
Ch 10
R1: starting from second chain from hook, 8sc, 3sc in the corner, 7sc, 2sc in the last corner (20)
R2: 8sc, 3inc, 9sc (23)
R3: 9sc, inc, sc, inc, sc, inc, 9sc (26)
R4: 8sc, inc, 2sc, inc, 2sc, inc, 2sc, inc, 8sc (30)
CC to blue
R5-6 sc around
R7: 9 sc, 6dec, 9sc (24)
R8: 6sc, 6dec, 6sc (18)
R9: 3sc, 6dec, 3sc (12)
Stuff
F/O CC to white
R10: BLO sc around
R11: 4sc, dec, rep 2x (10)
R12-22: sc around
stuff every 5 rounds
F/O leave long tail for sewing
Continue working shoes part in front loop of R9. It will be counted as R23
R23: FLO, sc around (12)
R24: fpsc around
F/O

Finishing:
See this picture as a guide in positioning every parts.

  • Cut felt to make eyes in oval shape then glue it on orange part.
  • Using black yarn, sew eyebrow and mouth.
  • Sew stalk on orange.
  • Sew leaf beside its stalk.
  • Sew its legs then using white yarn sew cross sign on the shoes.
  • Sew its hands.

Congratulation!! Now you've had your own Si Jeruk.

This pattern is made by me, Zan Merry. Don’t reprint it to your site or blog. If you upload your own The Orange with your picture on your blog, please credit me asdesigner. You can sale the ami that you’ve made from this pattern but not the pattern. And if you find any mistake in my pattern, please leave a comment so i can edit it.Thanks.
sealkazzsoftware.blogspot.com resepkuekeringku.com