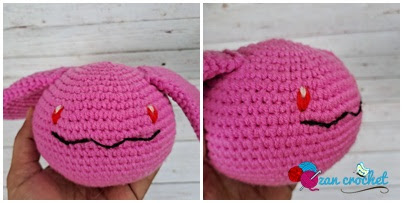
Showing posts with label amigurumi pokemon. Show all posts

Amigurumi Pokemon Luvdisc

 Pokemon Number: 370

Type: Water

Luvedisc is a fishlike Pokemon that has a flat body in the shape of a heart. It's seen as a symbol of love and romance. The normal Luvdisc is primarily light pink, with pale lips and circular markings on its cheeks, but the shiny version color is yellow.


Cups (make 2):
Use pink
R1:     ch 2, starting from second chain from hook 6 sc (6)
R2:     inc, rep 6x (12)
R3:     sc, inc, rep 6x (18)
R4:     2 sc, inc, rep 6x (24)
R5:    sc sround (24)
F/O leaving a long tail for sewing the gap between both cups, but don’t break the second cup’s yarn. We’re going to join both cups together in the next round
Body:
R6:    sc around in 1st cup, sc around in 2nd cup (48)
R7:    10 sc, dec, rep 4x (44)
R8:    sc around
R9:    9 sc, dec, rep 4x (40)
R10:    8 sc, dec, rep 4x (36)
R11:    sc around
R12:    7 sc, dec, rep 4x (32)
R13:    6 sc, dec, rep 4x (28)
R14:    sc around
Stuff the cup
R15:    5 sc, dec, rep 4x (24)
R16:    4 sc, dec, rep 4x (20)
R17:    sc around
R18:    3 sc, dec, rep 4x (16)
stuff
R19:    change color to light pink, 2 sc, dec, rep 4x (14)
Attach safety eyes to left and right side of body between R16-17, give space 6 sts between them.
R20:    2 sc, dec, rep 3x (9)
Add more stuff
R21:    sc, dec, rep 3x (6)
F/O

Blush
Use smaller size of yarn and hook 2 mm.   
Use light pink, ch 2, starting from second chain from hook 6 sc (6) sl st to 1st st
F/O leaving along tail for sewing.

Finishing:
-    Sew the blushes near the eyes.
-    Use black embroidery floss, embroider the mouth.

Amigurumi Pokemon Skiploom

Skiploom is a Pokemon NO 188. it is a dual-type Grass/Flying Pokémon.

Abbreviations:
sc: single crochet
ch: chain
st: stitch
inc : increase (2 sc in one st)
dec: decrease (2sctog)
Sl st : slip stitch
R: round/row
F/O: Fasten Off
Rep: repeat
 
Materials:
3 mm crochet hook
5 ply milk cotton yarn, 1 skein = 50 gr
•    Main color : shocking pink 1 skein
•    Other color : yellow, and white
Glue
Tapestry needle for sewing
Polyester fiberfill
Stitch marker
Red, white and Black embroidery threads for sewing the eyes and the mouth.
Scissors
 
Notes:
• This pattern uses US terminology.
• This amigurumi is worked in continuous rounds. Mark the beginning of each round with a stitch marker. You can use a different color of yarn as an alternative to a stitch marker for marking the rounds. Just place it into the first stitch of every row/round as you go.
• Gauge is not important in this project.
• Use MR (magic ring) as an alternative of ch 2.
• Measurement:  approximately 11 cm tall.
• Skill Level: Intermediate

Head and Body:

Use shocking pink
R1:    ch 2, starting from second chain from hook, 6 sc (6)
R2:     inc, rep 6x (12)
R3:     sc, inc, rep 6x (18)
R4:     sc, inc, [2 sc, inc] rep 5x, sc (24)
R5:     3 sc, inc, rep 6x (30)
R6:     2 sc, inc, [4 sc, inc] rep 5x, 2 sc (36)

R7:     5 sc, inc, rep 6x (42)
R8:     3 sc, inc, [6 sc, inc] rep 5x, 3 sc (48)
R9:    7 sc, inc, rep 6x (54)
R10:     4 sc, inc, [8 sc, inc] rep 5x, 4 sc (60)
R11:     9 sc, inc, rep 6x (66)
R12-17:    sc around
Attach safety eyes between R12-13, give 10 sts between them.
R18:     9 sc, dec, rep 6x (60)
R19:     4 sc, dec, [8 sc, dec] rep 5x, 4 sc (54)
R20:     7 sc, dec, rep 6x (48)
R21:     3 sc, dec, [6sc, dec] rep 5x, 3 sc (42)
R22:     5 sc, dec, rep 6x (36)
R23:     2 sc, dec, [4 sc, dec] rep 5x, 2 sc (30)
stuff
R24:     3 sc, dec, rep 6x (24)
R25:    2 sc, dec, rep 6x (18)
R26:    sc, dec, rep 6x (12)
R27:    dec, rep 6x (6)
F/O

Ears (make 2):
Use shocking pink
R1:     ch 12, starting from second chain from hook, 10 sc, 3 sc in the last st, continue your work st around the other side of chain, 9 sc, inc (24)
R2:    inc, 9 sc, (inc =3x), 9 sc (inc =2x) (30)
R3-4:    sc around
R5:    13 sc, dec, rep 2x (28)

R6:    12 sc, dec, rep 2x (26)
R7:    sc around
R8:    11 sc, dec, rep 2x (24)
R9-11:    sc around
R12:    4 sc, dec, rep 4x (20)
R13:    sc around
R14:    3 sc, dec, rep 4x (16)
R15:    sc around
Add 2 sc to make the last st on the corner of the round.
 R16:    Flatten the arm, crochet through both sides of the arm at once, 8 sc
F/O leaving a long tail for sewing


Legs (make 2):

Use shocking pink
R1:    ch 2, starting from second chain from hook, 6 sc (6)

R2:     inc, rep 6x (12)
R3:    3 sc, inc, rep 3x (15)
R4:    sc around
R5:    3 sc, dec, rep 3x (12)
R6:    sc around
R7:    4 sc, dec, rep 2x (10)
R8:    sc around
stuff
R9:    dec, rep 5x (5)
F/O leaving a long tail for sewing
 
Arms (make 2):
Use shocking pink
R1:     ch 2, starting from second chain from hook, 6 sc (6)
R2:    sc, inc, rep 3x (9)
R3-5:    sc around (9)
Stuff
Flatten the arm. Then, by using a slip stitch, crochet through both sides of the arm at once.
F/O leaving a long tail for sewing.
 
Tail:
Use pink
R1:    ch 2, starting from second chain from hook, 6 sc (6)
R2:    inc, rep 6x (12)
R3:    BLO, sc around
R4:    4 sc, dec, rep 2x (10)
R5:    3 sc, dec, rep 2x (8)
R6:    sc around
stuff
F/O leaving a long tail for sewing.
 
 
Flower:
Center:

Use white
R1:    ch 2, starting from second chain from hook, 6 sc (6)    
R2:     inc, rep 6x (12)
R3:     sc, inc, rep 6x (18)
R4:    sc around
R5:    sc, dec, rep 6x (12)
R6:    dec, rep 6x (6)
F/O leaving a long tail for sewing.  Flatten the center and give a little sew to make it stay in its position.


Petals (make 8):
Use yellow
R1:    ch 6, starting from the second chain from hook, 4 sc, 3 sc in the last st, continue your work st around the other side of chain, 3 sc, inc (12)
R2:    sc around
R3:    2 sc, dec, rep 3x (9)
R4:    sc around
R5:    7 sc, dec (8)
R6:    3 sc, dec, 3 sc (7)
F/O leaving a long tail for sewing

 
Finishing:
-   Sew the ears on R6 of the head.

-   Embroider the eyes on the head (from R9-10 to R11-12) by using red embroidery thread. Give a little sew on the corner of the eyes by using white thread.
-   Embroider the mouth by using black embroidery thread.

-   Sew the petals around the center and give a little sew to the side of petals.

-   Sew the flower on the top of the head.


-   Sew the arms between R17-18, give space  15 sts between them.
-   Sew the legs to the back of the body, around R17-18, and give space 10 sts between them.
-   Sew the tail to the back of body, on R15-17.

 If you have any problems with this pattern, or find any mistakes or want to give feedback, please feel free to contact me at zancrochet@gmail.com

Thank You


Amigurumi Pokemon Hoppip

Hoppip is a dual type Pokemon, Flying and Grass. It's Pokemon no 187. It's a pink plant Pokémon with long green leaves growing on top of its head.


Abbreviations:
sc: single crochet
hdc: half double crochet
dc: double crochet
tr: triple crochet
ch: chain
st: stitch
inc : increase
dec: decrease
Sl st : slip stitch
R: round/row
F/O: Fasten Off

Special stitch: Picot


 Materials:
3 mm crochet hook
5 ply milk cotton yarn in pink, light green, and black
Yellow felt
Glue
Tapestry needle for sewing
Polyester fiberfill
Stitch marker
Black thread for sewing the mouth
Scissors
Oval yellow safety eyes
wire 30 cm

Note:
This pattern uses US terminology.
Skill Level: Intermediate.
This amigurumi is worked in continuous rounds. Mark the beginning of each round with a stitch marker. You can use a different color of yarn as an alternative to a stitch marker for marking the rounds. Just place it into the first stitch of every row/round as you go.
Measurement:  approximately 11 cm tall (from legs to ears, leaves not counted)


Head and Body:
Use pink
R1:    MR, 6 sc (don’t close the MR completely)
R2:     inc, rep 6x (12)
R3:     sc, inc, rep 6x (18)
R4:     sc, inc, [2 sc, inc] rep 5x, sc (24)
R5:     3 sc, inc, rep 6x (30)
R6:     2 sc, inc, [4 sc, inc] rep 5x, 2 sc (36)
R7:     5 sc, inc, rep 6x (42)

R8:     3 sc, inc, [6 sc, inc] rep 5x, 3 sc (48)
R9:    7 sc, inc, rep 6x (54)
R10:     4 sc, inc, [8 sc, inc] rep 5x, 4 sc (60)
R11:     9 sc, inc, rep 6x (66)
R12-17:    sc around
Attach safety eyes between R12-13, give 10 sts between them.
R18:     9 sc, dec, rep 6x (60)
R19:     4 sc, dec, [8 sc, dec] rep 5x, 4 sc (54)
R20:     7 sc, dec, rep 6x (48)
R21:     3 sc, dec, [6sc, dec] rep 5x, 3 sc (42)
R22:     5 sc, dec, rep 6x (36)
R23:     2 sc, dec, [4 sc, dec] rep 5x, 2 sc (30)
stuff
R24:     3 sc, dec, rep 6x (24)
R25:    2 sc, dec, rep 6x (18)
R26:    sc, dec, rep 6x (12)
R27:    dec, rep 6x (6)
F/O

Ears (make 2):
Use pink
R1:     ch 2, starting from second chain from hook, 6 sc (6)
R2:    sc, inc, rep 3x (9)R3:    2 sc, inc, rep 3x (12)
R4:    3 sc, inc, rep 3x (15)
R5:    4 sc, inc, rep 3x (18)
R6:    2 sc, inc, rep 6x (24)
R7:    3 sc, inc, rep 6x (30)
R8:    sc around
F/O leaving a long tail for sewing

Inner Ears (make 2):
Use black
R1:    ch 7, starting from the second chain from hook, sc in each st (6), ch 1, turn
R2:    2 sc, dec, 2 sc (5), ch 1, turn
R3:    sc, dec, 2 sc (4), ch 1, turn
R4:    dec, dec (2),  ch 1, turn
R5:    dec (1)
F/O leaving a long tail for sewing
 
Legs (make 2):
Use pink
R1:    ch 2, starting from second chain from hook, 6 sc (6)
R2:     inc, rep 6x (12)
R3:    3 sc, inc, rep 3x (15)
R4:    sc around
R5:    3 sc, dec, rep 3x (12)
R6:    sc around
R7:    4 sc, dec, rep 2x (10)
R8:    sc around
stuff
R9:    dec, rep 5x (5)
F/O leaving a long tail for sewing
 
Arms (make 2):
Use pink
R1:     ch 2, starting from second chain from hook, 6 sc (6)
R2:    sc, inc, rep 3x (9)
R3-5:    sc around (9)
Stuff
Flatten the arm. Then, by using a slip stitch, crochet through both sides of the arm at once.
F/O leaving a long tail for sewing.


Tail:
Use pink
R1:    ch 2, starting from second chain from hook, 6 sc (6)
R2-12:     sc around
F/O leaving a long tail for sewing.
 

Leaves (make 2):
Wire needed: 30 cm
Use light green
The leaf is being crocheting in the round, starting with a base chains row. The round around the chains row is being crocheted around a metal wire as well.
R1:    ch 21, starting from the second chain from hook, sc, (hdc, picot, hdc = in the same st), ( sc, hdc, (dc, picot, dc= in the same st), hdc = rep 2x), sc , hdc, dc, (tr, picot, tr = in the same st), dc, hdc, sc, hdc, (dc, picot, dc = in the same st), (hdc, dc, tr, picot, tr, dc, hdc = in the last st), continue your work st around the other side of chain, (dc, picot, dc = in the same st), hdc, sc, hdc, dc, (tr, picot, tr = in the same st), dc, hdc, (sc, hdc, (dc, picot, dc = in the same st), hdc = rep 2x), sc, (hdc, picot, hdc = in the same st, sc + sl st to the 1st st
F/O Wrap around the wire by using the yarn till the end of wire. Glue the end of wrapping if needed.


Finishing:
Embroider the mouth and outer line around the eye by using black thread.
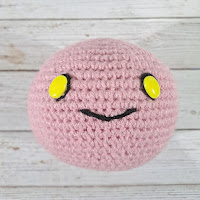

Put the leaves in MR. Fasten the MR. You can glue or give a little sewing to make the leaves stay on its position.
Flatten the ears, and sew the front and back side of the last round together until the hole close completely.
Sew the inner ears to the right and left side of the ears.  Add some polyester fiberfill into the hole.
Sew the Ears on R4-9 of the head.


Sew the arms on R19-20, give space 10 sts between them.
Cut two yellow oval-shaped pieces of felt measuring 16mm x 12 mm, depending on the tension and size of yarn you used, you may want to cut your felt larger or smaller.
Glue the felt on the leg. Then embroider the outer line around the felt.
Sew the legs to the back of the body, around R20-21.
Sew the tail to the back of body, on R17-18.


This pattern is an original by me, Zan Merry. Please do not claim this pattern as your own. If you wish to share this pattern, you may link this pattern but please do not reprint it to your site or share it in a pdf or picture format.

You may keep a copy of this pattern for personal use but you may not sell the pattern. You can sell the items that you made from this pattern as you credit me as the designer.

Please leave comment if you have a question or find any mistake in my pattern. I will do the corrections as soon as possible. I will be happy to see your creation from this pattern so please share your handmade to my Facebook Page Zan Amigurumi or Instagram @zancrochet

Thanks...

sealkazzsoftware.blogspot.com resepkuekeringku.com